
Primary Server
Complete the following steps on the primary server to configure the cluster:
- Create TCP Communication (Comm) Path(s)
- Verify the Communication (Comm) Path(s)
Before you begin, SIOS recommends at least two TCP communications paths between each server within the cluster to each remote server for heartbeat redundancy.
Access the LifeKeeper GUI
The LifeKeeper Web Management Console (LKWMCI) is a browser based view that can be run as on a LifeKeeper cluster with the appropriate packages.
The LKWMC is based on Java RMI with callbacks. Hostnames must be resolvable or you may receive a Java 115 or 116 errors.
- Verify that short hostnames and fully qualified hostnames of all cluster nodes resolve to the proper locations
# ping node-a
# ping node-a.domain.com
# ping node-b
# ping node-b.domain.com
- To start the LKWMC, install the LKWMC package (sios-lkwmc-<version>.tar.gz) available in the SPS-Linux software repository for the version of LifeKeeper you intend to use. Installation instructions can be found in the “lkwmc_readme.txt” file available in the same repository.
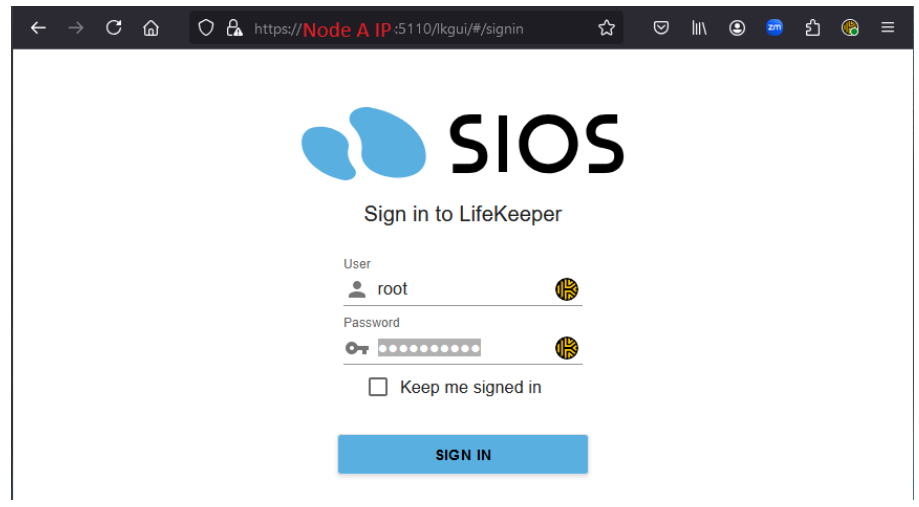
- To Connect to the LKWMC from a Web Browser, go to:
a. https://<hostname>:5110
or
b. https://<node-a IP address>:5110
- Enter root credentials (Username “root” and the “root” user password) and click OK. Optionally, select “Keep me signed in” if you desire to skip this step on subsequent access to the LKWMC.
Create Communication (Comm) Paths
- Within the LifeKeeper GUI, click the “Server>Communication Path” button on the toolbar located in the menu provided by the
![]() button located in the top left of the screen.
button located in the top left of the screen.
 button located in the top left of the screen.
- Click on the “Operations” dropdown and select “Create Communication Path”.

- On the “Create Communication Path” view, first click on the “ADD A NEW SERVER” button located on the right side of the dialogue box. This will open new fields in the dialogue box, at this time, only populate the “Remote Server” dialogue box with the remote system’s static IP address. Note, some fields will have default values, it is fine to leave these fields populated.When complete, click the “Confirm” button located directly to the right of the remote-server entry field.
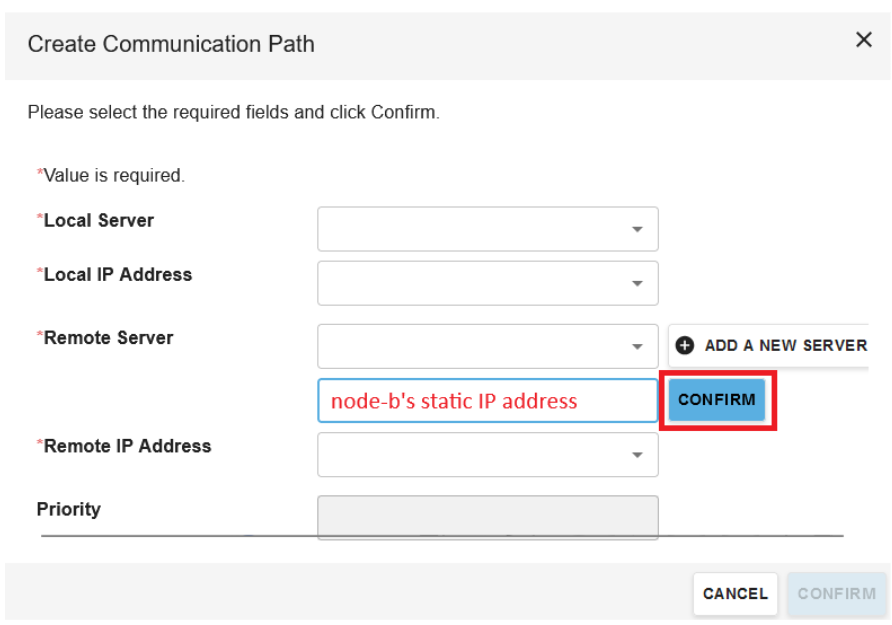
| Local Server | <Blank> |
| Local IP Address | <Blank> |
| Remote Server (Dropdown) | <Blank> |
| Remote Server (Text box) | Remote server’s static IP address |
| Remote IP Address | <Blank> |
| Priority | <Blank> |
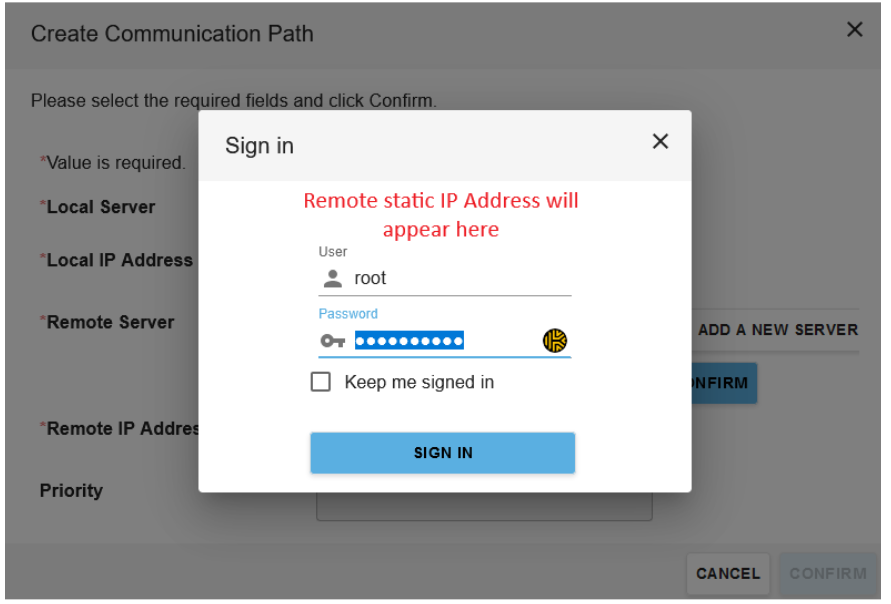
- You will be prompted for the root credentials for the remote server added, enter those in the dialogue box that appears.
- Once authenticated, enter the remaining details (shown in the table below) in the “Create Communication Path” view via the drop-down boxes. The
![]() icon indicates that the default option is chosen.
icon indicates that the default option is chosen.
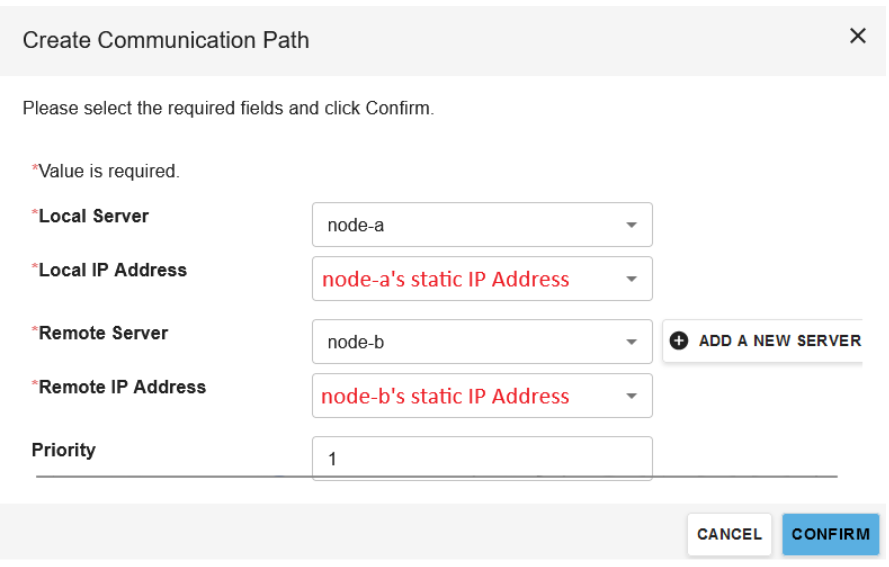
| Local Server | node-a (or local system hostname) |
| Local IP Address | <The static IP address for the local system> |
| Remote Server | node-b (or remote system hostname) |
| Remote IP Address | <The static IP address for the remote system> |
| Priority | 1 |
- When complete, select “Confirm”. A screen with the selected options will appear, review these options and select “Create” when ready to continue.
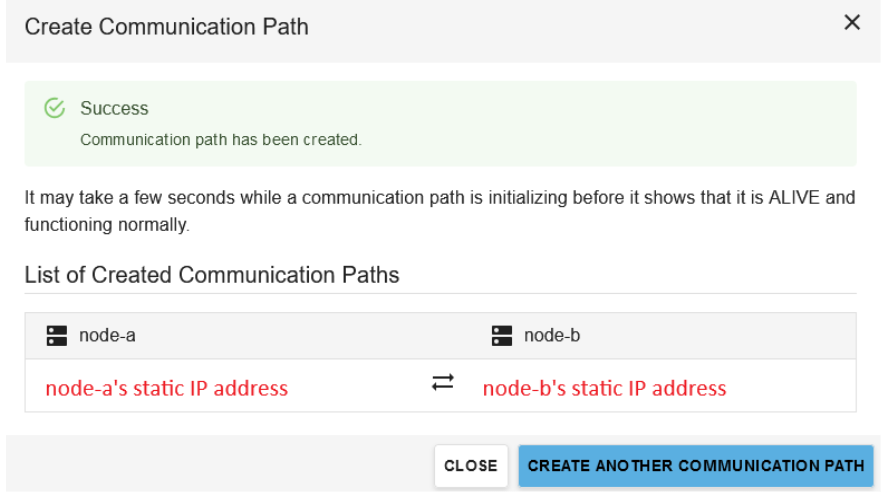
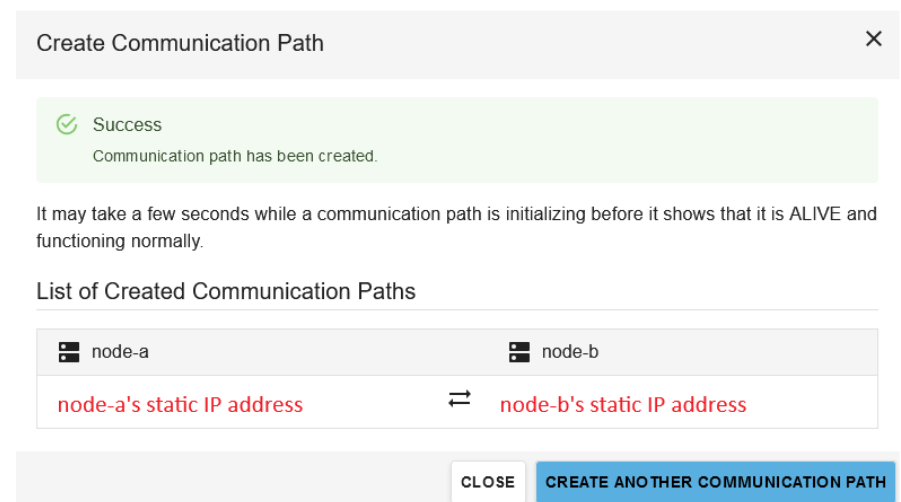
- Once created, a confirmation screen will be shown as demonstrated below:
Verify the Communications Paths
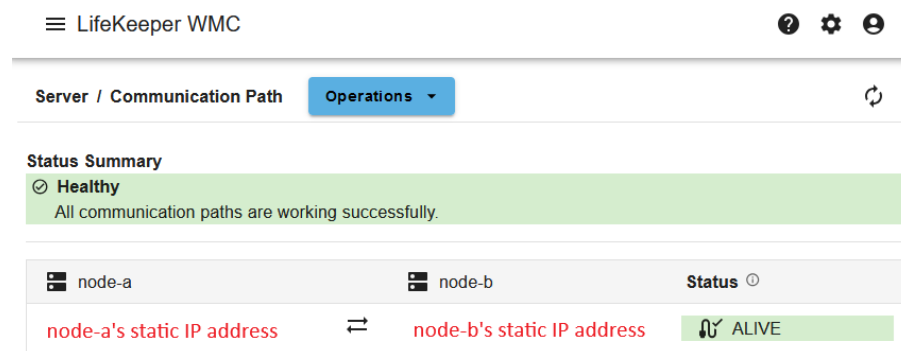
- In the “Server > Communication Path” view of the LifeKeeper Web Management console, click the
![]() button to refresh the communication path status. Note, immediately after creation, the communication path may show as dead until communications have been established leading to the “dead” state being shown until the view is refreshed.
button to refresh the communication path status. Note, immediately after creation, the communication path may show as dead until communications have been established leading to the “dead” state being shown until the view is refreshed.
 button to refresh the communication path status. Note, immediately after creation, the communication path may show as dead until communications have been established leading to the “dead” state being shown until the view is refreshed.
- Verify that the communications paths are configured properly by viewing the communication path details in the view, and confirming that the status is shown as “ALIVE”
Create the LifeKeeper Hierarchy
Create a Mirror and Begin Data Replication
In this section we will set up and configure the Data Replication resource, which will be used to synchronize the MySQL database’s data between cluster nodes. The data we will replicate resides in the /var/lib/mysql partition on our Primary cluster node.
Please note:
- The source volume to be replicated must be mounted on the Primary server
- The target volume, which will receive replicated data, must NOT be mounted on the Secondary server.
- The target volume’s size must equal to or larger than the size of its source volume.
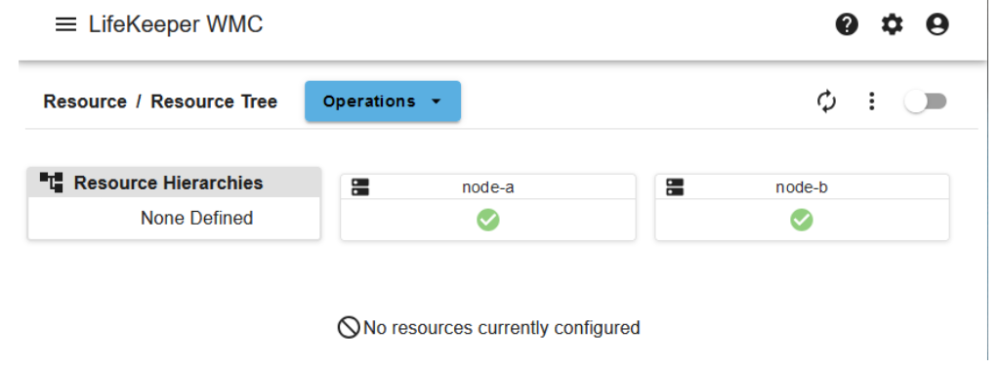
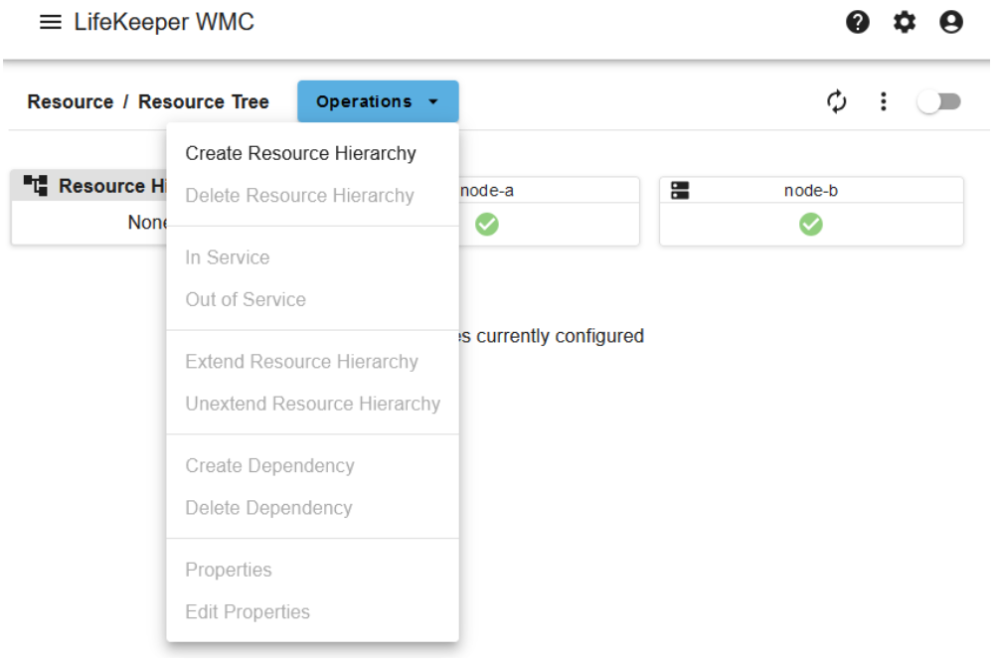
- Within the LifeKeeper GUI, click the “Resource>Resource Tree” button on the toolbar located in the menu provided by the
![]() button located in the top left of the screen. The below view will be displayed when in the Resource Tree view:
button located in the top left of the screen. The below view will be displayed when in the Resource Tree view:
- From the dropdown accessed by the “Operations” button, click “Create Resource Hierarchy”.
The Create Resource Hierarchy dialog box will appear with a drop down list box displaying a “server” dropdown containing all systems with an established communication path and a “Application Recovery Kit” dropdown containing all recognized Recovery Kits installed within the cluster. Select the following values as shown in the table below. Then click “Next”
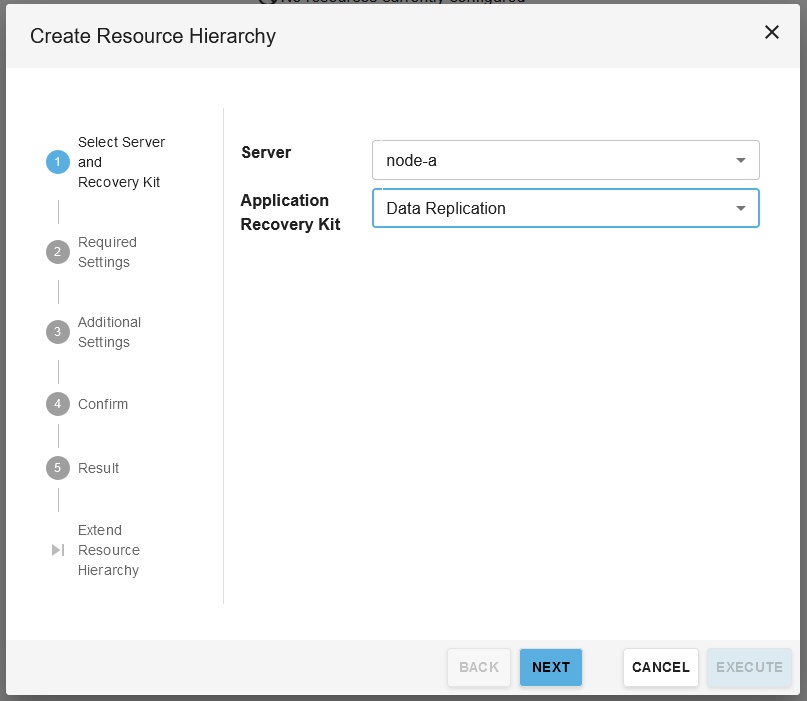
| Server | node-a (Or primary system hostname) |
| Application Recovery Kit | Data Replication |
- For the “Required Settings” step, select the desired Hierarchy Type. For the purpose of this guide, it will be assumed that the filesystem to be replicated already exists, so the “Use Existing File System” option is chosen. Then, select the information corresponding to the setting fields that appear. Once entered, click “Next”
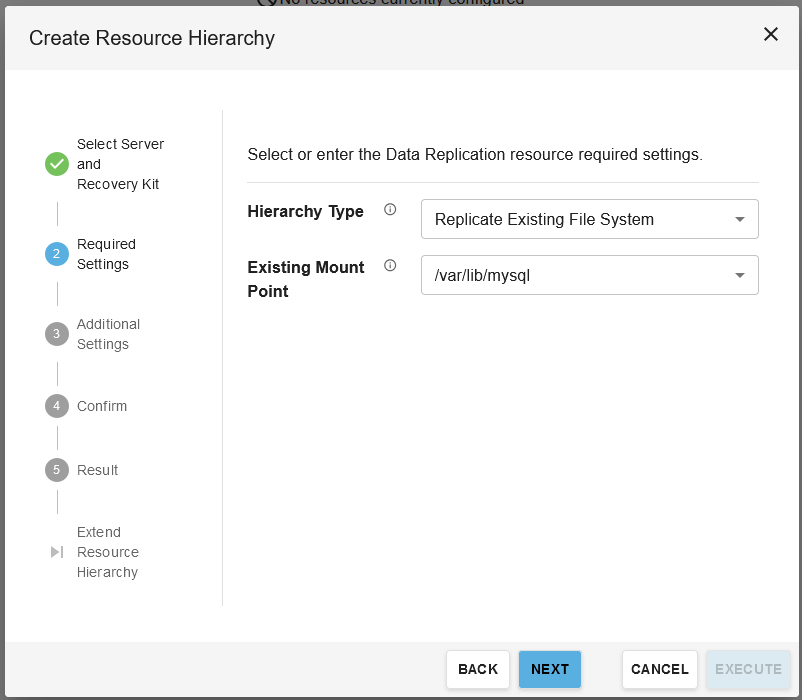
| Hierarchy Type | Replicate New Filesystem |
| Existing Mount Point | /var/lib/mysql |
- For the “Additional Settings” step, enter the following values, then click “Next”
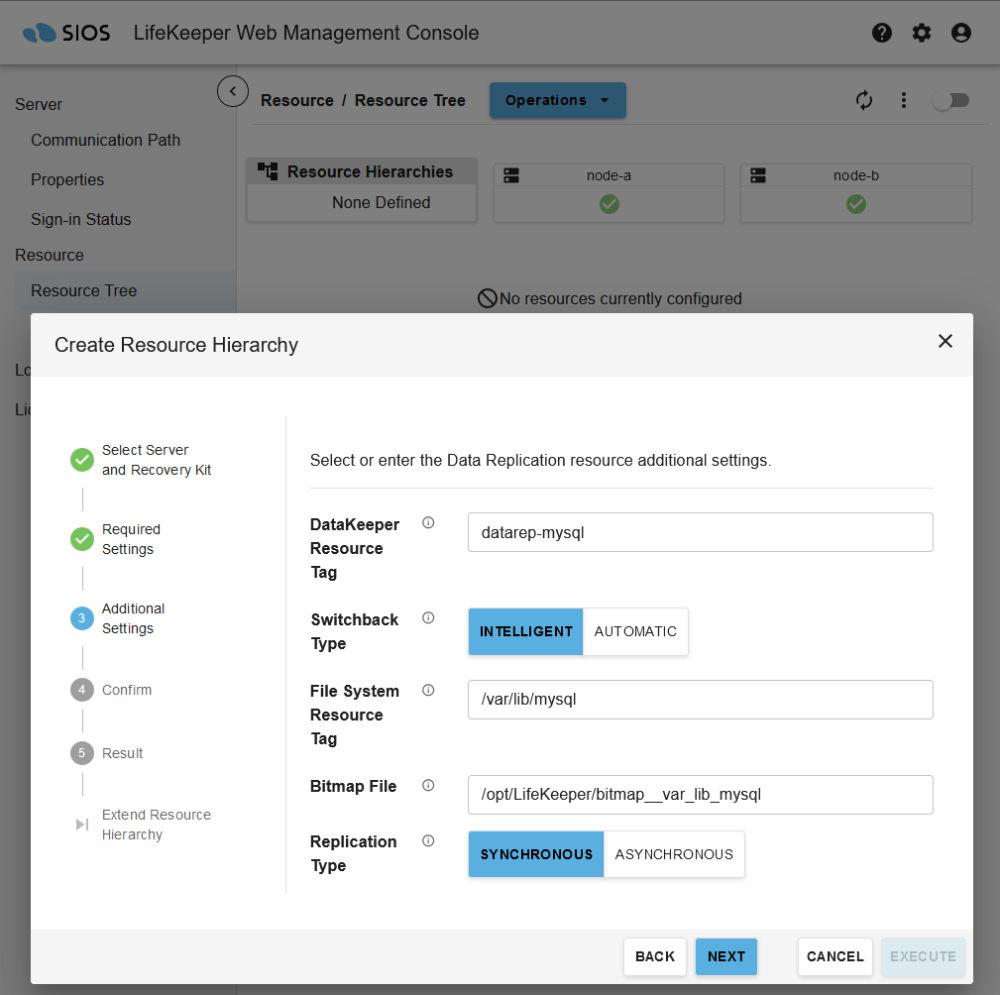
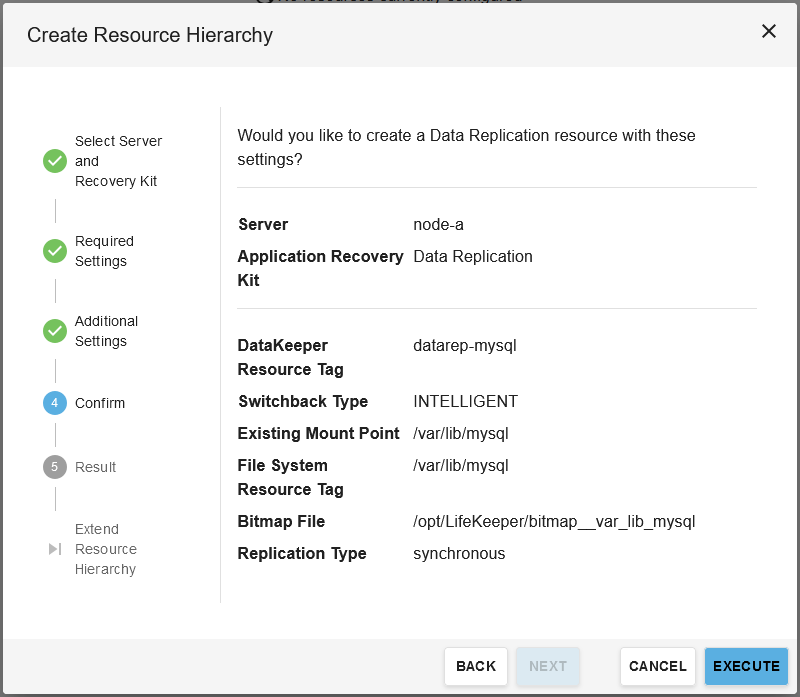
| DataKeeper Resource Tag | datarep-mysql |
| Switchback Type | Intelligent |
| File System Resource Tag | /var/lib/mysql |
| bitmap file | /opt/LifeKeeper/bitmap__var_lib_mysql |
| Replication Type | Synchronous |
- Review the selected options on the “Confirm” step and, when ready to continue, click “Execute” to begin creation of the Data Replication resource hierarchy.
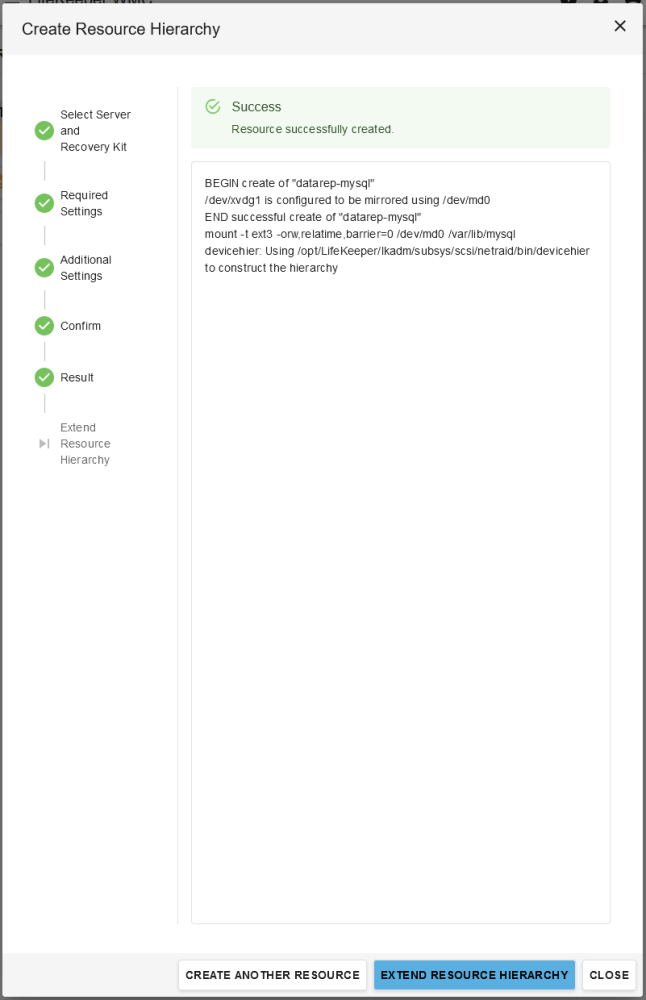
- The status will be displayed in the GUI as follows:
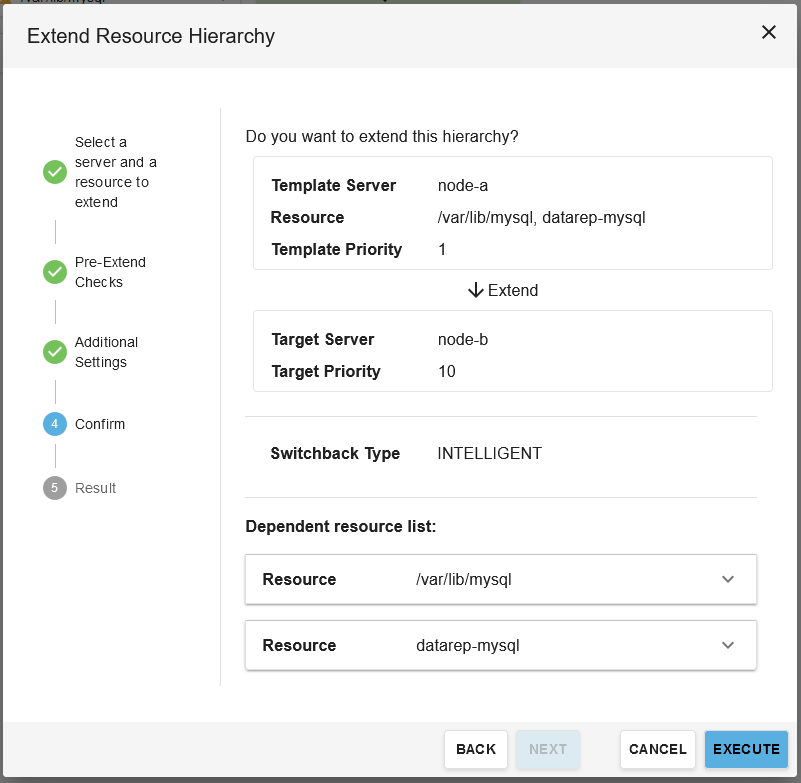
- Click “Extend Resource Hierarchy” to Extend the Data Replication Resource. Select all default settings the first step, as shown below. When complete, click “Next”.
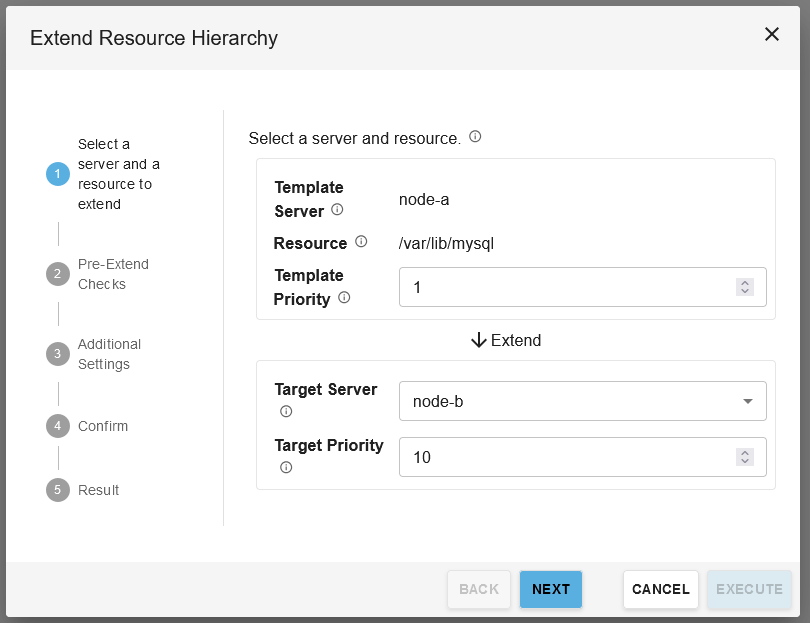
| Template Server | node-a |
| Resource | /var/lib/mysql |
| Template Priority | 1 |
| Target Server | node-b |
| Target Priority | 10 |
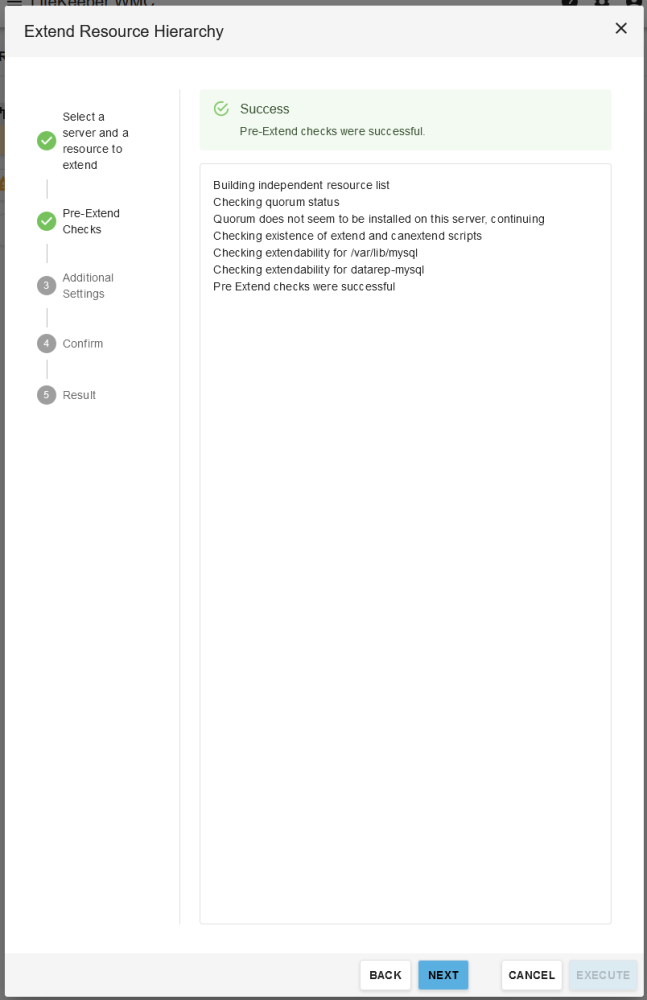
- Pre-extend checks will be performed. When complete, click “Next”
- In the “Additional Settings” Step, enter the following information by expanding the “Resource” dropdown to show the required fields. Note, when selecting the target disk, select a free partition on your Target server which is the same size (or greater) than the Source Volume we are replicating. This partition should NOT be mounted on the Target system. When complete, click “Next”
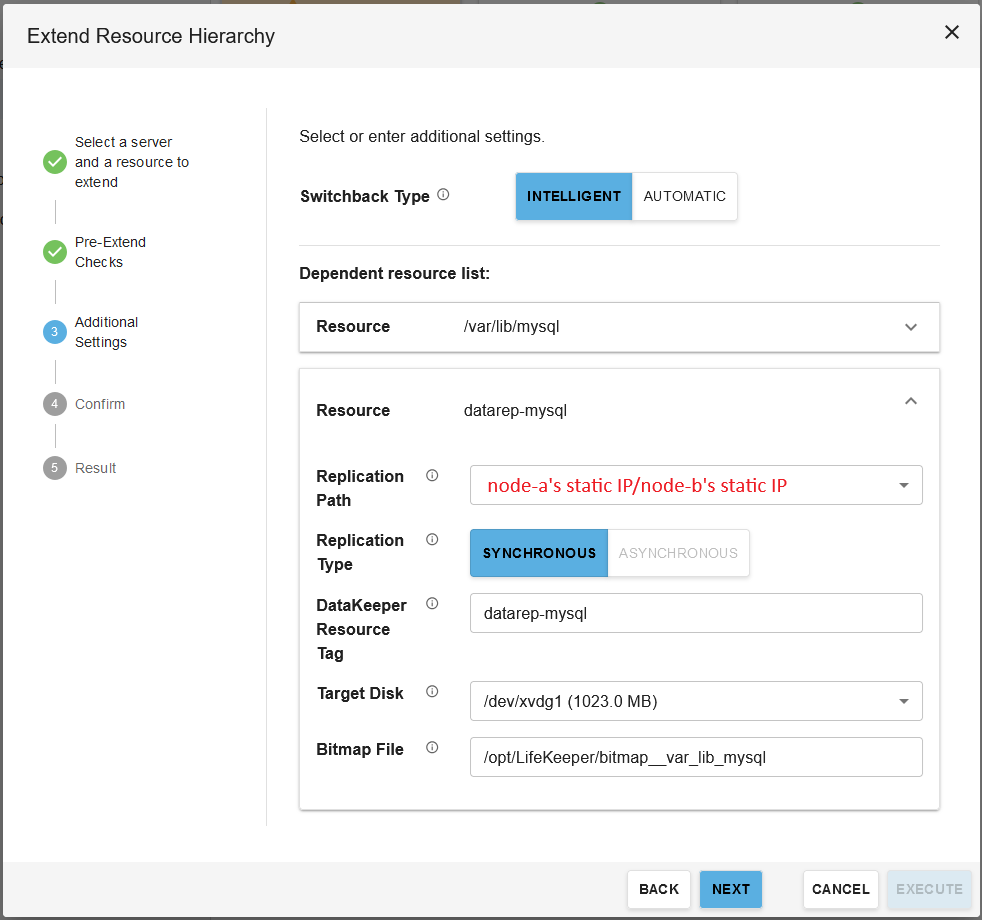
| Resource | datarep-mysql |
| Replication Path | Select the communication path defined earlier in this guide |
| Replication Type | Synchronous |
| DataKeeper Resource Tag | datarep-mysql |
| Target Disk | Select a free partition on your Target server which is the same size (or greater) than the Source Volume we are replicating |
| Bitmap File | /opt/LifeKeeper/bitmap__var_lib_mysql |
- Review the configured settings on the “Confirm” step. When ready to proceed with resource creation, click “Execute”
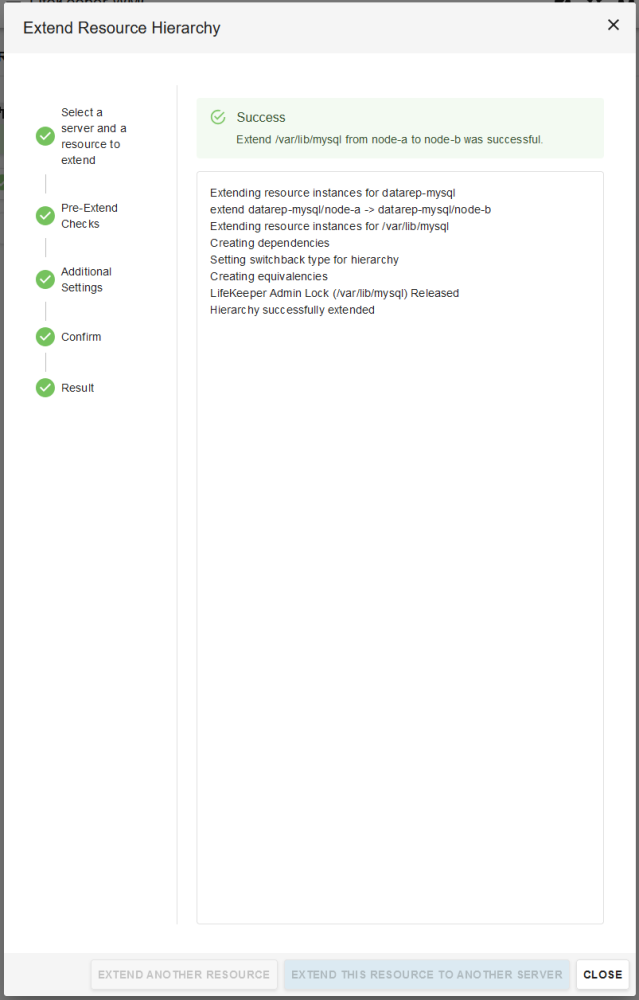
- The dialogue box will display the progress messages during resource extension, as shown in the below screenshot. Once complete, click “Close”
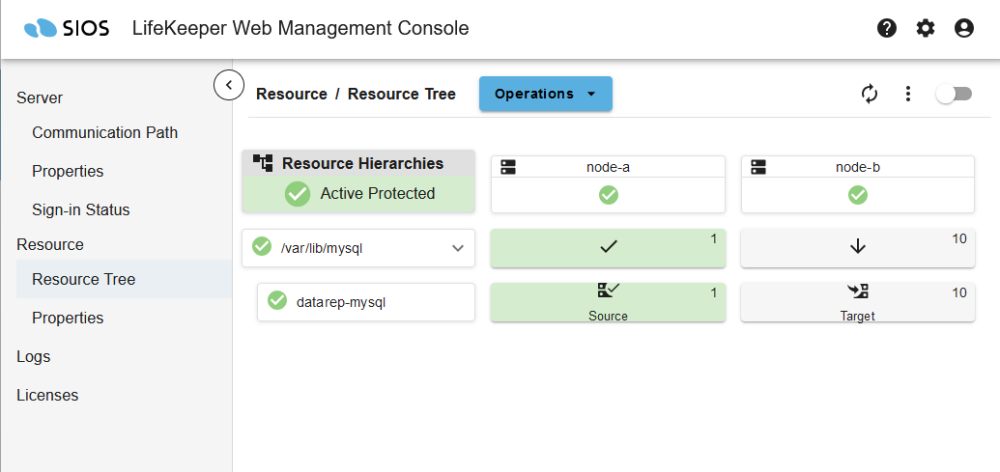
- Once completed, your resource hierarchy will look as follows
Disable Automatic Failover
In this section we will review the procedure for disabling automatic failover to the standby server.
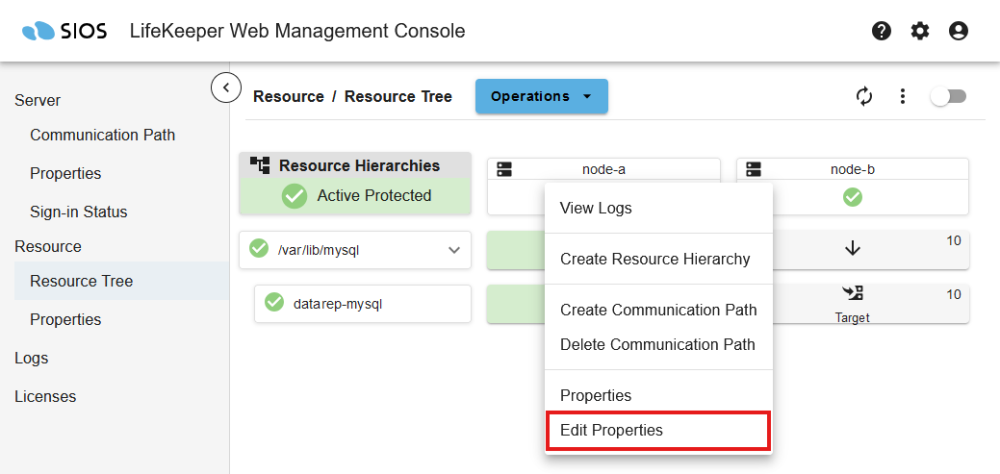
- From the LifeKeeper GUI, right click on one of the cluster nodes and select “Edit Properties”.
- Select the Source server from the “Server:” drop down at the top of the window
- Once the Server Properties window loads, select “on” for all fields listed at the bottom of the page. This will prevent any automatic failovers from happening.
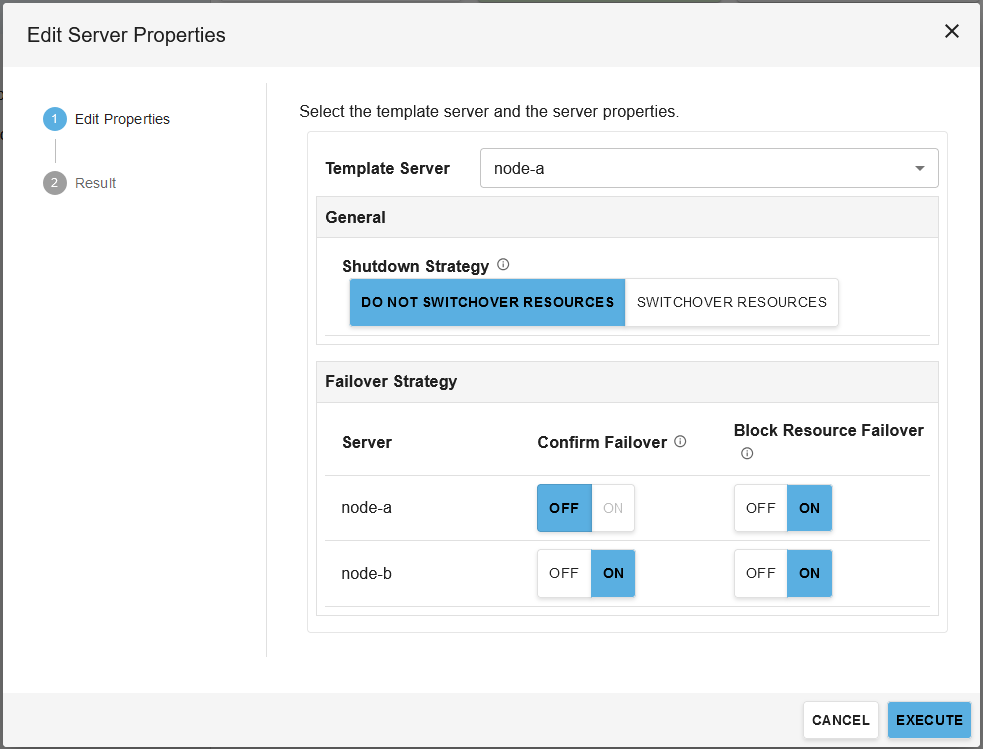
- Click “Execute”
- Repeat steps 2-4, this time selecting the Target server from the “Server:” drop down
- Next, edit /etc/default/LifeKeeper on both nodes
a. Set CONFIRMSODEF=1 (change from 0 to 1) in the “/etc/default/LifeKeeper” file
CONFIRMSODEF=1 #Default action if administrator instruction can’t be obtained
# when manual intervention is configured, due to timeout or
# other failure.
# 0=proceed with failover, 1=block the failover
CONFIRMSOTO=600 #Timeout period, in seconds, for waiting for administrator
# instruction prior to starting failover, if manual
# intervention is configured.
Post your comment on this topic.